Recipe! Winter Risotto and When in Winter . . . Photo Album

When in Winter . . .

. . . when leaves put on layers

. . . when delivery trucks slumber

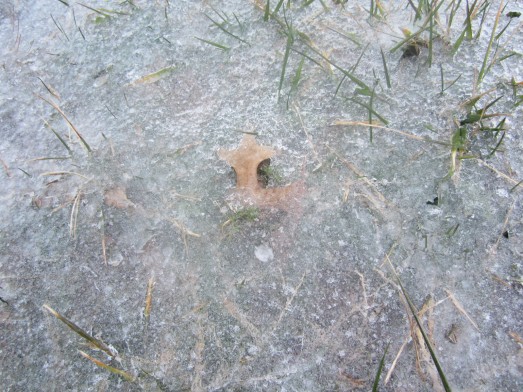
. . . when ice intends to linger

. . . when blooms pause for nature’s mourning

. . . do as Winter’s inhabitants do.

— Winter Risotto —

I am very proud of this dish. Weeks ago, I was playing around with what was left in my fridge and out came this warm risotto recipe. I find it a soothing dish for winter, and I hope you do, too. Though optional, I strongly suggest the cumin. Cumin is what makes this a winter dish to me. All risotto requires that I, and any cook, stick around to monitor it closely. No mind. The frost and ice outside do not tempt me but if they did, this dish would be a good antidote for frozen fingers and toes. 

Serves: Four

Prep time: approximately 45 minutes

Ingredients:

  • 1/2 cup scallions, chopped
  • 1/2 cup sun-dried tomatoes, chopped (preferably the already-dried product that comes in a bag, usually sold in produce section, as opposed to the jarred variety)
  • 1/2 cup onion, chopped
  • 1/2 shallot, thinly sliced
  • 7-9 slices of turkey bacon
  • 1/2 to 1 Tablespoon olive oil (for cooking turkey bacon)
  • 2.5 Tablespoons olive oil (for risotto base)
  • 1/2 Tablespoon butter
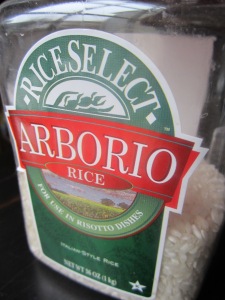
  • 1 cup risotto
  • 3 cups low-sodium chicken broth (vegetable broth will do as an alternative)
  • 1/4 teaspoon salt
  • 1/8 teaspoon black pepper
  • 1/4 teaspoon cumin, optional

Let’s do this!!

To cook bacon:

1. Slice turkey bacon. *See picture to the left.

2. Add 1/2 to 1 Tablespoon olive oil to large, round skillet and set to high heat.

3. Once skillet is hot, add turkey bacon.*In the picture, I’ve stacked bacon to make slicing easy. However, make sure to spread your bacon around the pan so it will evenly cook.

4. Cook for approximately 4-5 minutes, stirring around at least once or twice. Cook to desired crispiness. *If you include up to 9 slices, you may have to do in two batches (no new olive oil added)).

5. Remove bacon from pan and, to help drain the bacon’s grease, place bacon slices on a plate lines with a paper towel.

To cook risotto:

1. Pre-chop your scallions, sun-dried tomatoes, onions and shallot slices. Put to the side.

2. For risotto base, add 2.5 Tablespoons olive oil and 1/2 Tablespoon butter to a large, deep pot and put over medium-high heat.

3. Once oil and butter are hot, add onions and shallot slices. Cook for approximately 4 minutes, stirring frequently, until onions/shallot are translucent.

6. Reduce heat to medium. Add risotto and stir for approximately 2 minutes.

7. Add one cup chicken broth. Stir frequently until broth is absorbed. This will take approximately 10 minutes.

8. After first cup is absorbed, add second cup of broth, salt and pepper. Once again, stir frequently until broth is absorbed.

9. Add third cup of broth and cumin and absorb almost completely. Pull from heat immediately once only traces of broth are left in the pot.

10. Let sit for 1-2 minutes. Then add bacon, sun-dried tomatoes and scallions. Stir well. Enjoy with a nice loaf of Easy Little Bread from 101 Cookbooks.

Happy cooking! Happy eating!

Recipe! Peppers and Pancetta with Grits

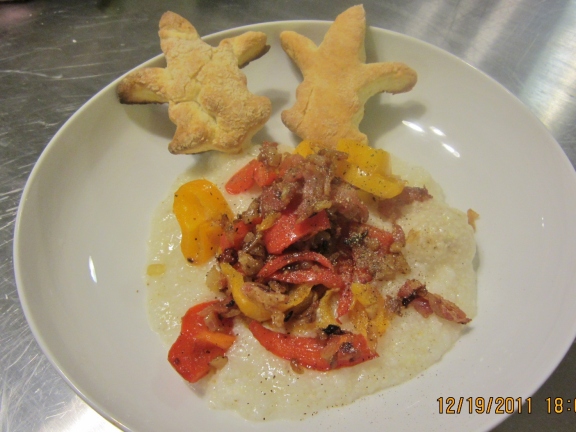
Grits, grits and more grits. They are smooth, buttery, sometimes cheesy, and they are the perfect antidote for chilly winter days, even though this January, at least, is shaping up to be a mild one. All the more reason to stock up on and spoon in grits ahead of time; your body will be conditioned for the warm grit onslaught that should be a key component of the chilliest part of winter. I have made this grits dish for three dinners so far. The last time I made it, I whipped up some Paula Deen’s Homemade biscuits, too, and, while chomping on a biscuit, thought that while this dish served as a great dinner, it would be the perfect dish for a brunch . . . and easy, too.

Mmmmm . . . grits and anything is a great combination! If you aren’t really familiar with grits, let’s get you there:

  • What are grits? coursely ground hominy
  • What is hominy? it is when the bran and germ have been removed from a piece of corn
  • Each year, St. George, SC hosts the World Grits Festival! The festival started there because they’d realized at one point that they were the place that ate “more grits per capita than any other place in the world.”* The festival holds an event called “Rolling in the Grits,” which sounds absolutely a mess but awesome, too.
  • GRITS is the acronym for the Georgia Registry of Immunization Transaction and Services, a unit that handles vaccination records and disease prevention for the state. Once you know this fact, just forget about it when eating your grits.
  • Speaking of Georgia, I learned that they made grits their State Prepared Food back in 2002. I’ve gotta say, “Dammit, Louisiana! What the hell were you waiting around for, a personal invitation?”
  • Grits is a Nashville-based musical act, and their music is not what you are thinking, I bet. Get a taste.
  • Back to South Carolina’s St. George . . . Major reason to support St. George’s World Grits Festival: it has churned out recipes including Deep Fried Grits-n-Cheese, Hot Tomato Grits and Hush Puppy Grits. There’s no way to go wrong with grits in any form, especially fried.
  • Across the internet, a factoid abounds that 3/4 of the grits sold in the U.S. are sold in the “grits belt,” the area of the country that covers Texas to Virginia.

That grits is a Southern-based food should not deter you. Time to own those grits.

Peppers and Pancetta with Grits

Ingredients:

Makes enough for four.

*Note: You can also substitute couscous for the grits in this dish. Cook according to directions on the package. Scroll to the bottom of the page to see pictures of both dishes.

For grits:

  • 3/4 cup old fashioned grits (Quaker or similar)
  • 3/5 cups water
  • 1/2 – 1 Tablespoon butter
  • salt and pepper

For peppers and pancetta:

  • 1.5 Tablespoons olive oil
  • 1 Tablespoon chopped garlic
  • 1/2 shallot, sliced
  • 1 medium onion, sliced
  • salt and pepper, to taste
  • 1 bag of mini peppers (10-11 rainbow peppers in a bag) or 3-4 large peppers, chopped
  • 3/4 Tablespoon butter
  • 6 slices or approx. 6 ozs. pancetta, loosely chopped

*Please prep your ingredients. It will really make your cooking more enjoyable.

For grits:

1. Cook grits according to directions on package. I have based my ingredients on the Quaker Old Fashioned Grits product. This product advises you to cook your grits for 15-20 minutes, but I cook mine a little longer to help with water reduction. When I cook my grits, there is still some water at the top of my grits after about 23 minutes or so, but I pull the pot from the heat and let it sit while I finish up my peppers, and the results are delicious.

NOTE: ** I would advise against turning up the heat to speed up the process because grits will harden.  Just be sure to start testing your grits after about 15 minutes to get them to your liking.

2. I add my salt throughout the process and then add my pepper and butter at the end of the process; I do it all to taste.

For peppers and onions (while grits are cooking):

1. To a large skillet over medium heat, add olive oil and chopped garlic. Let saute for one minute.

2. Add shallot and onion to skillet; lightly salt and pepper. Saute for approximately 3.5 minutes.

3. Add all of your peppers; lightly salt and pepper. Add 3/4 Tablespoon butter to pan. Saute for approximately 6.5 minutes.

NOTE: **With all of these time allotments, I am working on browning and doneness. My goal is for my onions to be browned and for my peppers to be lightly browned but still have some mild crunchiness to them. Monitor your cooking to achieve the consistency you desire. Overcooking will lead to soggier peppers. Some people like it this way.

4. Line a plate with a paper towel. After the peppers are to your desired consistency, transfer all of the sauteed ingredients to the plate. Return the skillet to the (still functioning) burner.

5. To the same skillet, add the pancetta. Render until golden brown, which takes approximately 5 minutes.

6. When pancetta is ready, return peppers and onions back to same skillet. Stir ingredients together, move burner to low setting, heat for one minute.

7. To ready dish for presentation, make a bed of grits on a plate. Place peppers and onions atop grits. If desired and you have it, add a sprig of parsley or similar for a hint of green. You can also make these peppers on a bed of couscous for a lighter dish.

Peppers and Pancetta with Couscous

A Little Louisiana Love: Guest Blogger Jim Rigol’s Beans and Sausage Over Rice

I have tried my damndest to get this picture into this post, to no avail . . . yet. For now, click on the little, faint box with the ‘x’ to the left to see a visual of this yummy recipe.

Commentary and recipe courtesy of Jim Rigol, eatitnow’s Guest Blogger for this week and my boss back at the good ol’ Louisiana Dept. of Health.   

This is my personal favorite and my signature dish among friends and family.  It is fairly unique in that it employs a lot of sausage, which, being skinless and very juicy, is probably the best part of the product.  When nearing the bottom of the pot, polite diners have had to use self-discipline in allowing the other table partners to get the last generous share of the burst-in-your mouth succulence.

It works well with large Limas or red beans.  My favorite is the large Lima beans.

I have been using this recipe for about 30 years but have to admit that it is a close adaptation, especially for the measurements of herbs, to a recipe in The New Orleans Cookbook by Rima and Richard Collin.  I believe most, if not all, of the recipes in this book are from New Orleans restaurants in the 1800’s, such as Galatoire’s.  The book is full of the real deal of New Orleans sauces, appetizers, meats, fish, veggies, breakfast, lots of desserts, and even drinks.  When I was single and between marriages and was wanting to impress my dinner guest, I only owned two cookbooks: The New Orleans Cookbook and White Trash Cooking, the latter purchased primarily so I could make biscuits.

Beans (Large White Lima or Red) and Sausage – Recipe courtesy of Jim Rigol

Ingredients:

  • 5 Tablespoons Olive Oil
  • 1-1 ½ large Bell Pepper, chopped
  • 6-10 fresh Scallions, remove root stem tip and any “dead” skin or tops, chopped
  • 1 large or two small Onions, chopped
  • 1 small (or ½ of a big) Jalapeno (very finely diced with seeds removed)
  • 2 Tablespoons Garlic, chopped (jar type OK, add last)
  • small amounts of white wine or water to help with rendering
  • 1 large Tablespoon Parsley
  • 1/8 – ¼ teaspoon Basil
  • 1 teaspoon Salt
  • 1/8 teaspoon Chevril
  • ¼ teaspoon Black Pepper
  • 2 whole Bay Leaves
  • ¼ teaspoon Thyme
  • 3 lbs. skinless sausage
  • 1 lb. Lima or Red Beans
  • 5-6 cups Water

**BIG TIP: PREPARING WILL SAVE YOU TEARS! PRE-CHOP AND PREPARE ALL OF YOUR INGREDIENTS FOR THIS DISH. YOU WILL BE GLAD YOU DID.

1. Add the olive oil to a large stick-resistant pot on low or low-medium heat.

2. Gradually add the following chopped seasonings in the order listed and STIR OFTEN, adding small amounts of white wine or water to keep the seasonings from browning while they are rendering.

  • 1-1 ½ large Bell Pepper, chopped
  • 6-10 fresh Scallions, remove root stem tip and any “dead” skin or tops, chopped
  • 1 large or two small Onions, chopped
  • 1 small (or ½ of a big) Jalapeno (very finely diced with seeds removed)
  • 2 Tablespoons Garlic, chopped (jar type OK, add last)

3. Next add the herbs, stirring each herb into the seasoned stock. Keep the heat.:

  • 1 large Tablespoon Parsley
  • 1/8 – ¼ teaspoon Basil
  • 1 teaspoon Salt
  • 1/8 teaspoon Chevril
  • ¼ teaspoon Black Pepper
  • 2 whole Bay Leaves
  • ¼ teaspoon Thyme

4. Add Sausage once all of the seasonings and herbs are in the pot.

  • 3 lbs. skinless – like juicy and delicious Eckrich Skinless Combination Pork, Turkey, Beef Sausage. Slice into roughly ½” pieces and stir into simmering seasoning and herbs for 5-10 minutes.

5. Finally, add Beans and Water to pot.

  •  Rinse 1 lb. Lima or Red beans in colander and add to pot, along with 5 to 6 cups of water or enough to completely cover everything in the liquid.

6. Stir, cover pot and cook on very low heat for about 2 hours for Lima Beans or 3 hours for Red Beans. You will need to stir occasionally. *Do not over-cook and make pasty, although after cooking you can keep them warm on low heat for a couple of hours.

7. Don’t forget to make the Rice! Use any rice, like standard long grain or Uncle Ben’s, white or brown. Uncle Ben’s might produce firmer rice more often, especially with the brown kind. I prefer making the white long grain somewhat soft, but not sticky, in order to soak up all of the tasty juices. In any case, do not use too much water. I usually use a little less water than the directions call for.

Thanks so much for contributing, Jim. Happy cooking! Happy eating, Everyone!

Only Saints Host Slumber Parties . . . Plus! Pizza Pinwheels with Dipping Sauce Recipe

Photo courtesy of Dynamite Imagery, freedigitalphotos.net

Dear Mom,

This is my plea to you to forgive all of us, every single one of us, who ever came into your home once per year and demanded that you give us over 14 solid hours of fun.

Oh, come on, you know what I’m referencing. They have to be the reason anxiety pills were invented. I’m talking about those good ol’ slumber parties you hosted, year after year after year.

At the height of those slumber party years, I do believe you hosted approximately eight of us, give or take a girl who didn’t spend the night because of having her tonsils removed . . . and who proceeded to scream at the top of her lungs when she couldn’t go skating with us. One, two, three, four, five, six, seven. Seven is a large number of cats to have, much less little girls who gab and gab about cute boys and unfair teachers.

Each year, I requested my constants—pizza and ice cream for dinner and pancakes in the morning. Each year, you delivered.

I ask, though, how could you do what you did? I’ve wondered:

a)      how you managed to stretch a dollar to put my favorite foods on the table for all of us girls—don’t remember you ever slapping down a credit card for any of our purchases

b)      how you tolerated a bunch of 13-year-old girls who stayed up half the night to literally scream about who had the better set of friends (sorry for waking you up; had the Michelle-Ignorantly-Throws-A-Pillow-At-Your-Sleeping-Face Wake-Up Incident of 1991 happened prior, I’d’ve known better.)

c)       how you had the patience to keep going even after the party. Having pictures developed in those days required at least two trips to the store in hopes that one grainy picture might preserve the event.

I don’t know if you were having fun, too, at those parties. After sitting through the commotion of each year, agreeing to host them must’ve held something. Oddly, I’ve pondered your rationale approximately once per year since those days. Allowing us to fill balloons with shaving cream just so we could smash them with our butts made for an awesome clean-up task. You surely knew we’d half-ass help. Serving us each a mound of pancakes made for a grueling morning of grunt work. The thing about pancakes, too, is that your plate was ready when everyone else had long left the table to pore over Tiger Beat pics.

How you tolerated us is still elusive, but why you did so is becoming clearer with each equinox. Even if we didn’t mesh the whole time, my friends and I meshed most of the time. We turned cartwheels, told jokes, played games, and shared spoons of ice cream and cups of Coke. We skated and sang and danced. We made memories.

I still vividly recall me and five of my friends chomping on pizza one birthday, crammed around the worn kitchen table. One friend, Heather, had brown hair and two fingers that were connected at birth. At school, her self-consciousness constantly prompted her to cover her hands under the backs of her thighs. At the party, however, I remember her joking and laughing about typical girl things–no relation to her fingers—and joining in on activities full force. To us, she was Heather, classmate and pal, not “Heather with the two fingers stuck together.” I hope I’m remembering correctly when I say this. Kids can be nosey as hell and often say things that are inadvertently cruel. She likely does not remember that party, but I hope to hell she had a good time. That’s what slumber parties are supposed to be about—so much fun that the things that make us self-conscious elsewhere are irrelevant. That’s what friends are supposed to be about*.

I can still viscerally feel the pang that always came in those final moments before the last parent came. I knew my friend was about to leave; I was just not sure when. Then there were more pangs when her mom arrived, when she tossed her sleeping bag into the car’s trunk and when both of them hugged us, said “Thanks,” and drove away.

While I technically can figure out how you physically did it, I still don’t know how you mentally did it. Now that I have a daughter of my own, though, I know exactly why you did it. When Baby O wants that slumber party, she’ll likely get it. I’ll stress out about whether my floor is dirt-free and over plan activities just enough to start a revolt. Or, I’ll do my best to model you. I’ll buy what I can with what I have and just let the girls work things out on their own, with occasional interventions. Like you, I will value a semi-restful night of sleep. My bubbly-ness while cooking the damn pancakes will be directly proportional to the number of hours of sleep I can get, girls.

I just have one caveat** for Baby O, a baby born in the 21st century and one who will be soaked with celebrity influence even on Sesame Street: no couture slumber parties. You didn’t host couture parties for me, and all of my memories, kerfuffles and all, are just perfect.

Your daughter,
Michelle

*Yes, I ended in a preposition.

**Other caveats, like good grades and limited sass, are implied.

Pizza Pinwheels

I’ve attached this recipe because it’s perfect to make for a party or just a fun thing to make with the kids at home. The 12 pinwheels it makes are plenty to feed 4-6 people, depending on how big your eaters are. Pair it with a nice, green salad and a beer for those 21+ and milk for those 20-, and you have a nice, little dinner that is fun to eat.

Makes 12 Pinwheels

Difficulty:           Easy to moderate

Prep time:           approx 40 minutes (15 minutes of pinwheels “resting” included)

Baking time:      30 minutes

*This is a recipe that requires your dough to be at room temperature and that includes other “resting” and baking times. Please read the directions to help you manage your time wisely.

Ingredients:

  • ¼ cup to ½ cup of flour, for flouring surface
  • One pound of prepared pizza dough, wheat or white
  • 2 Tablespoons olive oil
  • ¼ teaspoon oregano
  • ¼ teaspoon dried basil or small bunch of finely chopped fresh basil
  • Dash of salt and pepper
  • 2 cloves of finely chopped garlic or 2 teaspoons of minced garlic
  • 2.5 cups of shredded cheese (can be three-cheese blend, mozzarella, cheddar or blend of the latter two)
  • 1 package sliced pepperoni
  • 1 can pizza sauce or any spaghetti sauce

LET’S DO THIS!!

Photo courtesy of M. Byrd - Buy the prepared dough

1. Allow your prepared dough to sit until it reaches room temperature. *Even if it nears room temperature after 30 minutes, you can use it. It will likely have slightly less malleability, however. I’ve done it and don’t have any complaints.

2. Cover a cookie sheet in aluminum foil and grease the foil.

3. Cover a large, flat surface in a light coating of flour. Make sure you have enough room to roll out your dough into a square/rectangular shape.

Photo courtesy of M. Byrd - Flour the surface.Photo courtesy of M. Byrd - Rolling out the doughPhoto courtesy of M. Byrd - Rolling out the dough

4. Cover your ball of dough in a light coat of flour. Using a rolling pin (or a tall glass if you’re desperate), roll out your dough until you acheive a square or rectangular shape. Roll your dough out until it is fairly thin because it will be easier to roll into a log.

Photo courtesy of M. Byrd - Rolling out the dough

5. In a small bowl, combine your olive oil, oregano, basil, salt and pepper. Stir.

6. Brush your olive oil mixture all over your dough.

7. Sprinkle your garlic all over your dough.

8. Cover dough from side to side in cheese and layer on as many pepperonis as you see fit. **Don’t be afraid to be liberal with your pepperonis, but getting absolutely crazy may make your rolling a big pain later.

Photo courtesy of M. Byrd - Cover in cheese and pepperoni from side to side

9. Starting at a shorter end (assuming rectangular) or any (assuming square), tightly roll your dough towards the opposite end. ***Mine is always fairly tight but not insanely tight. You don’t want to break the dough. You do need to be firm here because if you roll too loosely, your slices will fall apart.

Photo courtesy of M. Byrd - The dough, rolled

10. Once you have rolled your dough into the shape of a log, begin cutting the dough at an angle. IMPORTANT: Use a serrated knife. Cut at an angle right in the middle. Then, proceed to cut each half in half and so on, until you have cut 12 slices.

11. Place your pinwheels on your greased cookie sheet.

12. You will now let your pinwheels sit for approximately 20 minutes. While they are “resting,” preheat your oven to 375 degrees.

Photo courtesy of M. Byrd - Resting Pinwheels

13. Rest for a second. You deserve it.

14. After 20 minutes of having the pinwheels “rest,” place them in the oven for 20 minutes of cooking.

15. Prepare your egg wash by mixing eggs and water. **This egg wash will help your final pinwheels to come out nice and shiny. If you are out eggs, this is not a necessary step, but it definitely will make your pinwheels look more appealing.

16. After 20 minutes, remove your pinwheels and brush each one with egg wash.

17. Return to over for approximately 10 more minutes. ***Since ovens vary, keep an eye on your pinwheels.

18. At the end of 10 minutes, your pinwheels should be done. Serve them up and enjoy.

19. For dipping sauce, I use the brand and flavor of spaghetti sauce that I prefer. Happy cooking! Happy eating!

Photo courtesy of M. Byrd - serve with dipping sauce and an ice cold beer (or milk)

Voila! Happy cooking! Happy eating!